Accessibility Check For Powerpoint For Mac
Like any document, it is easiest to make PowerPoint slides accessible for digital. Select the Check Accessibility button from the Review tab again when you.
Like any document, it is easiest to make PowerPoint slides accessible for digital distribution when you plan to do so from the start. Choose a Theme PowerPoint has built-in themes and templates to help make creating presentations easier. Use these whenever possible, as this helps with content structure and reading order. The slides have pre-set font and paragraph styles, but these can be modified. Rather than changing a style for each slide, a default can be set for the entire presentation. Default themes and styles allow for proper content structure and consistency.
• From the main ribbon, select View. • Select Slide Master. Any change that is made within the master slide view will affect all slides that use that master.
• On the master slide, highlight the text you would like to modify the style for. • Right-click, or choose the Home tab.
From there you can change the font, font style, color and size of the text • Choose Paragraph. Google drive for mac downloads but won't open. From there you can change text alignment, line spacing before and after paragraphs and tabs. • Line spacing is the amount of space between lines of text in a paragraph. Users with visual impairment or cognitive disabilities have trouble tracking lines of text that are too close together.
If lines of text are spaced too far apart, they seem unrelated and can be difficult to read. • Keep paragraph text lines at a spacing of 1.5. • The space after a heading should be slightly less than the space above the heading. To change the spacing select Line Spacing Options from the format menu then add or remove space before or after the element. • Select Close Master View when finished Pro Tip If you like the styles you have set and want to reuse them in each new document you create, you can save them as your default templates.
• From the Slide Master tab, choose Themes • Select Save Current Theme • Type the name of your template in the Export as box. The Where field should direct you to the Themes folder. • Select Save. Formatting Tips • Use 24pt type or larger for paragraph or bulleted text (headings should be larger) • Don’t use more than one font. • Use a font designed for the screen and available on most computers like Georgia, Verdana, Trebuchet, Arial, Calibri, Gill Sans, Corbel or Calisto MT. Slide Titles Each slide should have a title, as this helps assistive technology. However, you can choose to hide a title so it doesn’t show on the slide.
• From the main ribbon, select the Home tab. • In the Arrange menu section, choose Selection pane. This displays all objects that are on a slide. • The eye icon next to the slide title will toggle visibility. Toggling off an unused title box allows assistive technology to detect a title for each slide, but keeps it hidden. Text Equivalents with Alt Text All images in a PowerPoint presentation should have alternative text assigned. • Select an image in your document.
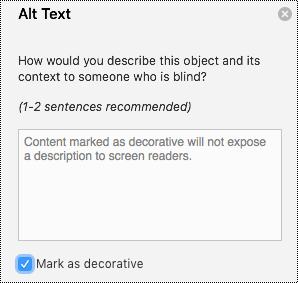
• Right select the image then choose “Format Picture” • Choose the Size and Properties tab • Provide a full description in the description box. In the case of the SUNY Oswego logo, you would write “State University of New York at Oswego.” If the image is more complex, like a chart, provide a title for the chart in the “title” box and a full description of the chart in the “description” box. • If the image is purely decorative and adds no additional information to the slide, check the “Mark as decorative” box. • As the designer of the presentation, it is important to know why an image is included, and the alt attribute should be generated based on that reason, or what the image is meant to relay to the audience.